
How to use Google Adsense on Blog and start making money
How to Use Google AdSense on Your Blog and Start Making Money
Google AdSense is a popular way for bloggers and website owners to monetize their content by displaying targeted ads. By following this guide, you'll learn how to set up Google AdSense on your blog, optimize your ad placements, and start earning money from your online content.

Table of Contents
- Understanding Google AdSense
- Setting Up Your Google AdSense Account
- Integrating AdSense with Your Blog
- Optimizing Ad Placements for Maximum Revenue
- Monitoring and Improving Your AdSense Performance

1. Understanding Google AdSense
Before jumping into setup, it's essential to understand what Google AdSense is and how it works.
What is Google AdSense?
Google AdSense is an advertising program run by Google that allows publishers (bloggers, website owners) to display ads on their websites. Google connects advertisers with publishers, serving ads that are relevant to the content of the webpage. When visitors click on these ads, you earn money.
How Does AdSense Work?
- Ad Display: Google's algorithm matches ads to your site's content and visitor demographics.
- Earning Models: You earn money based on ad clicks (Cost-Per-Click, CPC) or ad impressions (Cost-Per-Thousand Impressions, CPM).
- Revenue Sharing: Google takes a percentage of the ad revenue, and you receive the rest.
Benefits of Using AdSense
- Easy to Set Up: Google provides straightforward integration tools.
- Relevant Ads: Ads are tailored to your audience.
- Scalable Earnings: The more traffic you get, the more you can earn.

2. Setting Up Your Google AdSense Account
Step 1: Create a Google Account
If you don't already have a Google account, create one at accounts.google.com.
Step 2: Sign Up for Google AdSense
Go to the Google AdSense website and click on "Sign Up Now." Follow the prompts to enter your website details and information about yourself.
Step 3: Submit Your Website for Review
After signing up, Google will review your site to ensure it meets their policies. This process can take a few days to a few weeks.
Step 4: Accept Google's Terms and Conditions
Once approved, review and accept Google's terms and conditions. This is a crucial step to ensure compliance with their policies.
3. Integrating AdSense with Your Blog
Step 1: Generate Ad Codes
After approval, log in to your AdSense dashboard. Navigate to the "Ads" section and create your first ad unit. Google offers various ad formats, including display ads, text ads, and link ads.
Step 2: Add Ad Codes to Your Blog
For WordPress Users:
- Install the "AdSense" plugin from the WordPress plugin directory.
- Copy the ad code from your AdSense dashboard.
- Paste the code into the plugin settings or use the "Custom HTML" widget in your theme.
For Other Platforms:
- Access your blog's HTML editor or theme files.
- Paste the ad code into the desired location (header, sidebar, within posts, etc.).
- Save the changes.
Step 3: Ensure Compliance with AdSense Policies
- Avoid Click Fraud: Do not click on your own ads or encourage others to do so.
- Follow Placement Guidelines: Ads should not blend in with navigation elements.
- Original Content: Your blog must have unique, high-quality content.
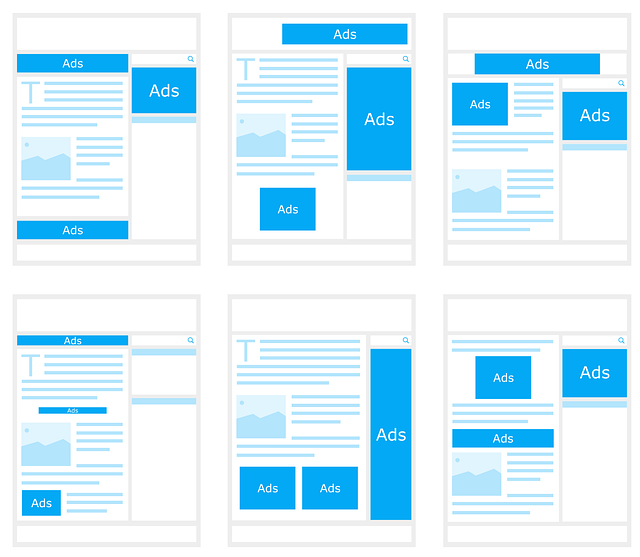
4. Optimizing Ad Placements for Maximum Revenue
Best Practices for Ad Placement
- Above the Fold: Place ads in highly visible areas, such as the top of the page or within the first few paragraphs.
- Between Content: Insert ads between sections of your blog posts to maintain reader engagement.
- Sidebar Ads: Use sidebar ads to capture attention without being intrusive.
- In-Feed Ads: Display ads within lists or grids of content.
Choosing the Right Ad Formats
- Display Ads: Visually appealing and contextually relevant.
- Text Ads: Simple and often perform well on content-heavy sites.
- Link Units: Text-based ads that blend seamlessly with your content.
- In-Article Ads: Ads that appear within the body of your text.
A/B Testing Your Ads
- Test Different Formats: Experiment with different ad types to see what works best.
- Monitor Performance: Use Google AdSense reports to track clicks and impressions.
- Adjust Based on Data: Remove underperforming ads and double down on what's working.
5. Monitoring and Improving Your AdSense Performance
Using Google AdSense Reports
- Performance Reports: Access detailed data on clicks, impressions, and earnings.
- Ad Unit Reports: Identify which ads are performing best.
- Blocking Controls: Exclude inappropriate or low-performing ads.
Tips to Increase Earnings
- Improve Traffic: Increase your blog's traffic through SEO, social media, and content marketing.
- Enhance Content Quality: High-quality, engaging content attracts more visitors and higher-paying ads.
- Experiment with Ad Sizes: Try different ad sizes, such as 728x90 (leaderboard) or 300x250 (medium rectangle).
- Use Auto Ads: Enable Google's Auto Ads feature to let Google automatically place ads optimally.
Common Mistakes to Avoid
- Too Many Ads: Overloading your blog with ads can annoy readers and hurt your SEO.
- Non-Compliance: Ensure your site follows Google's policies to avoid account suspension.
- Ignoring Mobile Users: Optimize your blog for mobile devices to capture mobile traffic.
Conclusion
By following these steps, you can successfully integrate Google AdSense into your blog and start earning money from your content. Continuous monitoring, optimization, and adherence to Google's policies are key to long-term success. Startsmall, experiment with different ad formats, and focus on providing value to your readers to maximize your earnings. Happy blogging!
1 Comments
Please login or register to leave a comment.
Hello everyone, i'm new in this blog