
How to build your own blog or website by using WordPress

How to Build Your Own Blog or Website Using WordPress

Introduction
WordPress is one of the most popular and user-friendly platforms for creating blogs and websites. Whether you're a beginner or have some web development experience, WordPress makes it easy to build a professional-looking site without needing to code. This tutorial will guide you through the entire process of setting up a WordPress blog or website, from choosing a domain name to customizing your site and launching it.
By following these steps, you'll learn how to:
- Choose the right WordPress platform
- Register a domain and hosting
- Install WordPress
- Design your site with themes and plugins
- Optimize and launch your blog or website
Let’s get started!
1. Choosing Between WordPress.com and WordPress.org
Before setting up your website, you need to decide which version of WordPress to use:
WordPress.com
- Hosted for you (no need to manage servers).
- Free plan available but with limitations (your site will have a WordPress.com subdomain like
yoursite.wordpress.com). - Premium plans remove ads and offer more customization.
- No need to install additional plugins.
- Best for beginners who want a simple blog with minimal tech hassle.
WordPress.org (Self-Hosted WordPress)
- Free open-source software, but you need to host it yourself.
- Full control over your site, including plugins, themes, and custom code.
- Requires purchasing a domain and hosting.
- Offers more flexibility and customization.
- Best for users who want complete ownership of their website.
Recommendation: If you want full control and flexibility, choose WordPress.org. For a hassle-free, quick setup, WordPress.com is a good option.

2. Registering a Domain Name and Choosing a Hosting Provider
Step 1: Buy a Domain Name
Your domain name is your website’s address (e.g., yourblog.com). To register one:
- Go to a domain registrar like Namecheap, GoDaddy, or Google Domains.
- Search for an available domain name.
- Purchase and register it (usually costs $10–$15 per year).
Step 2: Select a Web Hosting Provider
WordPress requires hosting, which stores your website files and makes them accessible online. Popular options include:
- Bluehost ( beginner-friendly, officially recommended by WordPress)
- SiteGround (fast, great support)
- Hostinger (affordable)
- A2 Hosting (high-performance)
Step 3: Install WordPress
Most hosting providers offer one-click WordPress installation:
- Log in to your hosting control panel (usually cPanel).
- Look for the WordPress installer (e.g., Softaculous, QuickInstall).
- Follow the prompts to install WordPress on your domain.
Once installed, you’ll get a WordPress admin dashboard URL (e.g., yourblog.com/wp-admin).
3. Setting Up and Customizing Your WordPress Site
Step 1: Log in to Your WordPress Dashboard
- Visit
yourdomain.com/wp-admin - Enter your username and password (set during installation).
Step 2: Choose a Theme
Themes control the appearance of your site.
- Go to Appearance > Themes > Add New.
- Browse free themes from the WordPress repository or upload a premium theme.
- Click Install and Activate to apply your chosen design.
Popular Free Themes:
- Astra (lightweight, customizable)
- OceanWP (e-commerce friendly)
- GeneratePress (fast and flexible)
Step 3: Install Essential Plugins
Plugins add functionality to your site.
- Yoast SEO (for search engine optimization)
- W3 Total Cache (to speed up your site)
- Akismet (for spam protection)
- Elementor (drag-and-drop page builder)
Go to Plugins > Add New, search for plugins, and click Install & Activate.
Step 4: Create Basic Pages
Every website needs essential pages:
- Home (your main landing page)
- About (who you are and what your site is about)
- Contact (ways for visitors to reach you)
- Blog (for your posts)
Go to Pages > Add New and create these pages.
4. Writing and Publishing Your First Blog Post
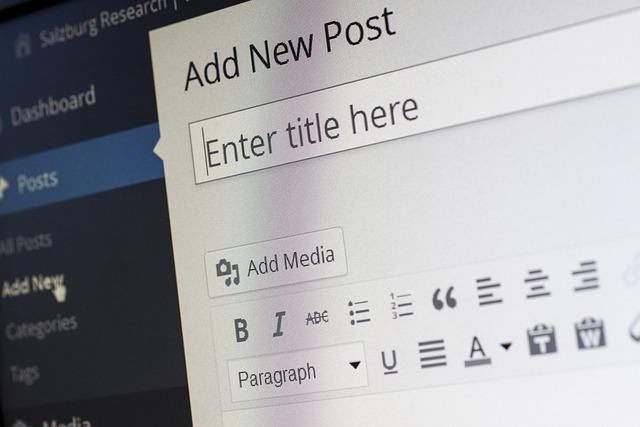
Step 1: Create a New Post
- Go to Posts > Add New.
- Add a title and content (use the block editor for easy formatting).
Step 2: Optimize for SEO
- Use Yoast SEO (or another SEO plugin) to optimize your post.
- Add keywords naturally in your text.
- Write a compelling meta description.
Step 3: Insert Images & Media
- Click the Add Block button (+) and select Image.
- Upload or insert images from your media library.
Step 4: Publish Your Post
- Click Publish to make your post live.
- Share it on social media to drive traffic.
5. Launching Your Website and Ongoing Maintenance
Step 1: Final Checks Before Launch
- Test your site’s speed (use GTmetrix or Pingdom).
- Ensure all links work.
- Check mobile responsiveness.
Step 2: Set Up Regular Backups
- Use UpdraftPlus to automatically back up your site.
- Store backups in Google Drive or Dropbox.
Step 3: Keep WordPress Updated
- Regularly update WordPress, themes, and plugins for security.
Step 4: Promote Your Website
- Share posts on social media (Facebook, Twitter, Pinterest).
- Use Google Analytics to track visitors.
- Consider email marketing to engage readers.
Conclusion
Building a blog or website with WordPress is a straightforward process once you follow the right steps. From choosing your domain to customizing your site and publishing content, WordPress provides all the tools you need to create a professional online presence.
Now that you have your website up and running, focus on creating high-quality content, optimizing for search engines, and engaging with your audience. The more effort you put into your site, the faster it will grow.
Happy blogging! 🚀
0 Comments
Please login or register to leave a comment.